
Guess what I did this weekend? I went out of my comfort zone, and attended a semi-private food photography course, instructed by Denise Woodward, with my best blogging buddy, Em. Isn’t she a doll? I was in this photo, but cut myself out of it as I was squinting up a storm. It wasn’t pretty!

I’m so glad I took the workshop with Em, as we were both totally clueless about our DLSR cameras, and had been taking all of the photos for our blogs using the automatic settings on our cameras, I know, LAME!
This course was so eye opening, because I finally learned about aperture, shutter speeds and ISO’s. I really had no clue as to what those meant before taking this course, seriously. Denise helped Em and I get out from shooting in automatic,(yaay) and shooting in manual! Em and I were there from 10:00 till 4:00, and we were spent by the end of the day. It was literally information overload, and when I got home I was ready for a glass of wine and a brainless movie with the family. John, the kids and I hit DJ’s for dinner, and then went to see Spiderman. It was the perfect ending to a perfect day.

We learned so much that I want to share it all with you, but I can’t fit it into one blog post. I will highlight on some of the major points today, and add another post later.
First off, you need to invest in a tripod. I thought I didn’t need on, but when the light is low, your shutter speed tends to be slower, (1/60 sec or slower) and any slight movement or shake, will result in blurred photos. I thought I had steady hands until Denise turned down the lights and I took some photos without a tripod. They were blurred and not crisp. When I used the tripod my photos were clear and perfect. Luckily, I have a tripod in the garage somewhere that I am going to start using. If you don’t have a tripod, here is a link to the tripod that Denise uses and highly recommends.


Aperture:
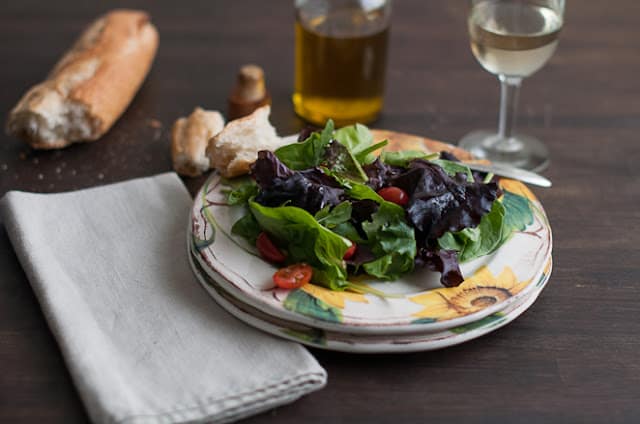
The aperture is the size of the lens opening (called the f-stop or f-number). It controls the amount of light that is let in: a larger aperture (f/1.4) lets in more light, while a smaller aperture (f /16) lets in less light. A larger aperture (lower f/number) will have your subject in focus, and everything in front of and behind it blurry. This photo below was taken with an aperture of f/1.4. You also will want to have a larger aperture if you’re shooting in a low light situation.

A smaller aperture will have your subject in focus, and everything in front of and behind it quite focused as well. This photo below was taken with an aperture of F/16.
If you’re ready to move from shooting auto to manual, then you should start out shooting in the aperture priority or aperture (A) setting on your camera. When you’re in the aperture setting, you set up the aperture (or f-stop) while the camera automatically calculates the appropriate shutter speed to expose the image correctly (so you don’t have to worry about setting that). As you become more familiar with how the camera calculates the shutter speed to the aperture setting, then you can try moving over to the M or manual dial on your camera. In the manual setting you will manually set up the shutter speed as well as the aperture. I am going to keep working at the A setting for now, and slowly move over to the M setting as I become more familiar with shutter speeds.
ISO:
ISO is kind of complicated to explain, but here is a great link if you’re interested in learning more. Denise told Em and I to keep our ISO at 400 for food photography. You can increase it to 800 or higher at night-time to let in more light to the camera, which will then result in a faster shutter speed. The shots will be a bit grainer and more “noisy” the higher you set the ISO. Feel free to experiment with the ISO at different settings as you get more use to working manually with the camera.
White Balance:
Keep your camera set to auto white balance. You can change the white balance when you edit your photos, if you wish.
RAW vs. JPEG:
For food photography, Denise recommended for us to shoot our photos in RAW. This does take up more memory on your camera, but its well worth it.
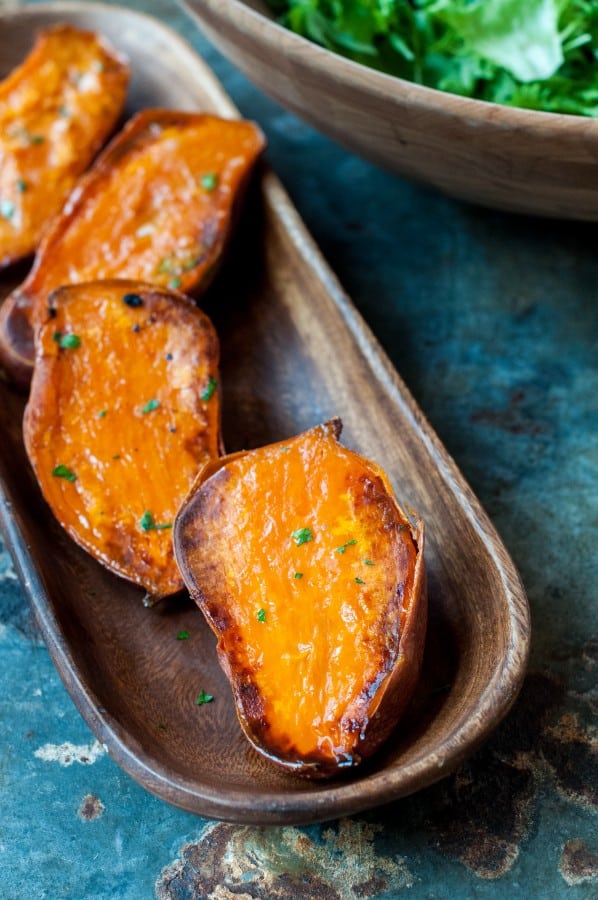
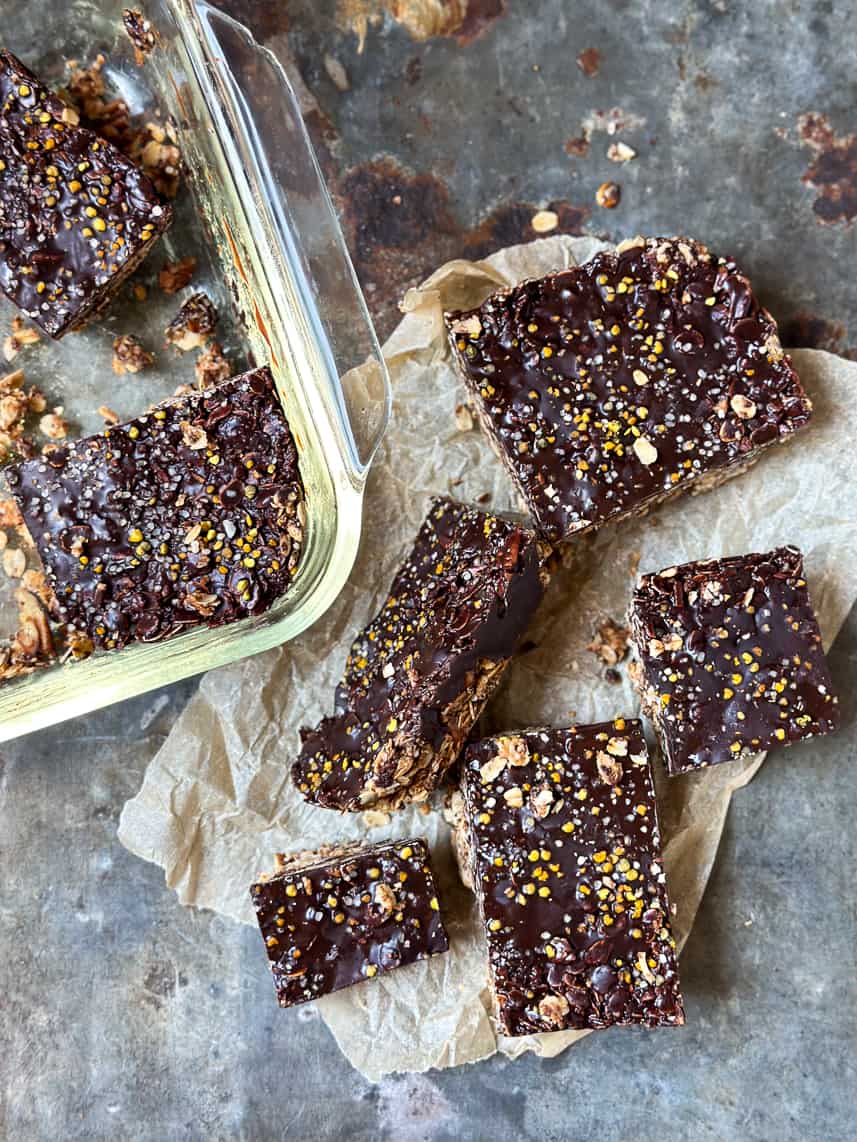
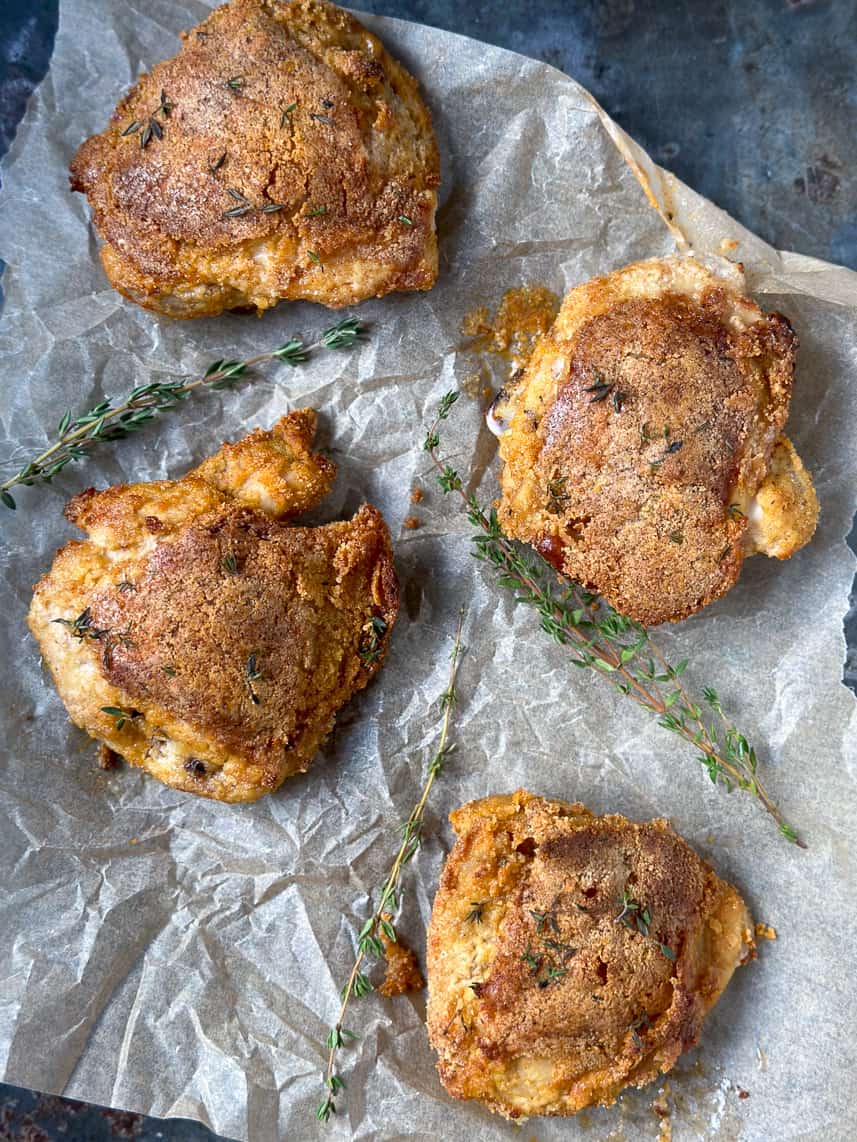
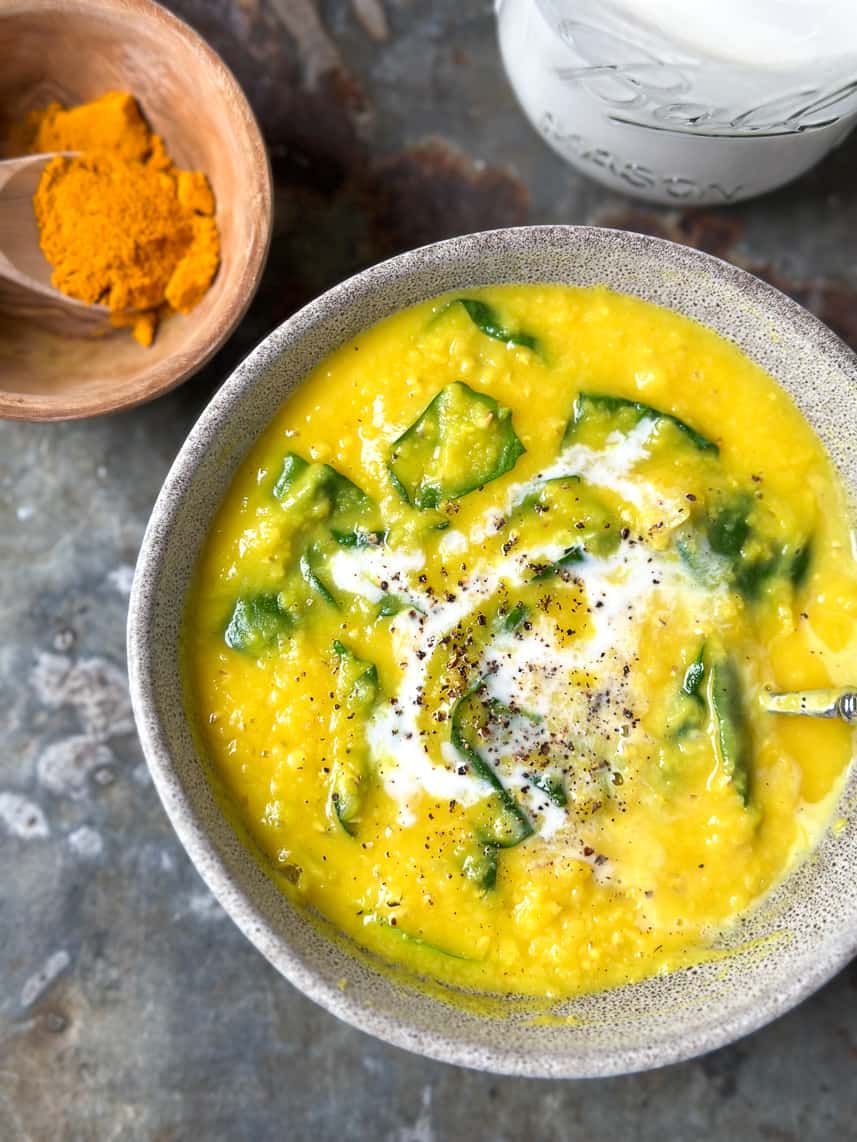
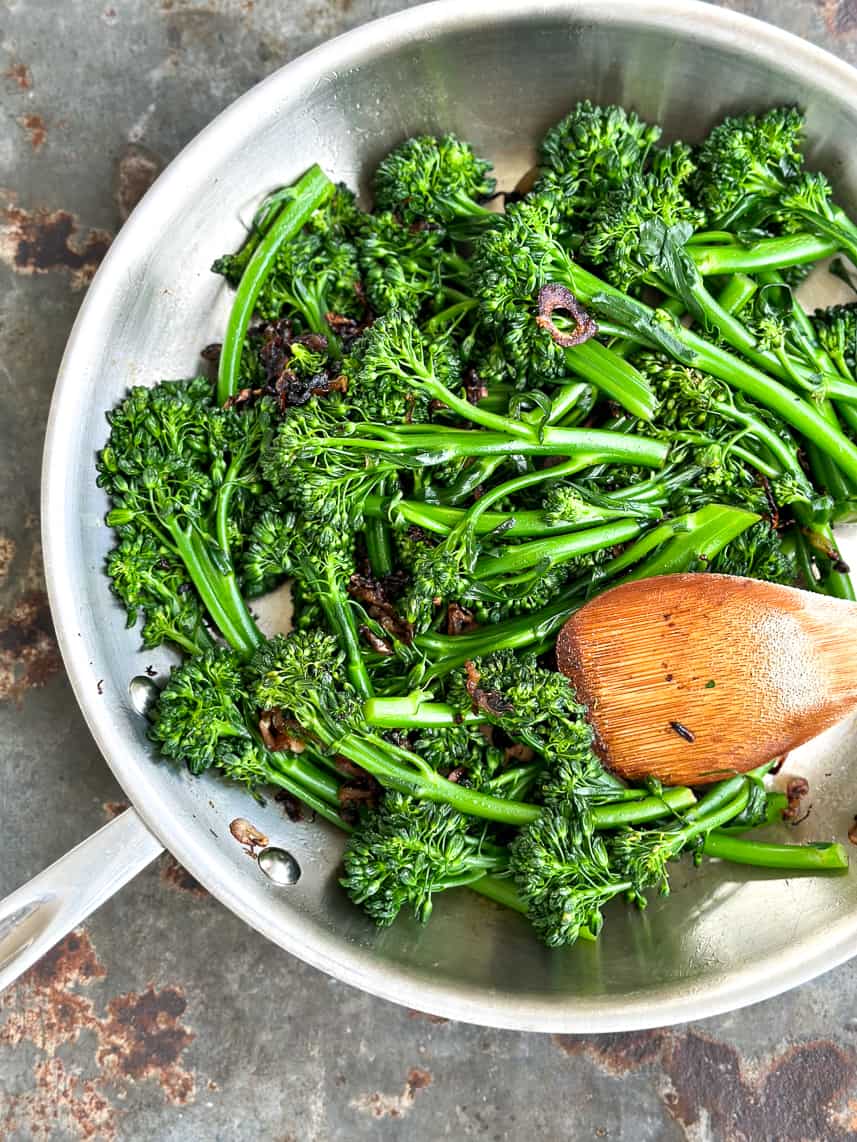
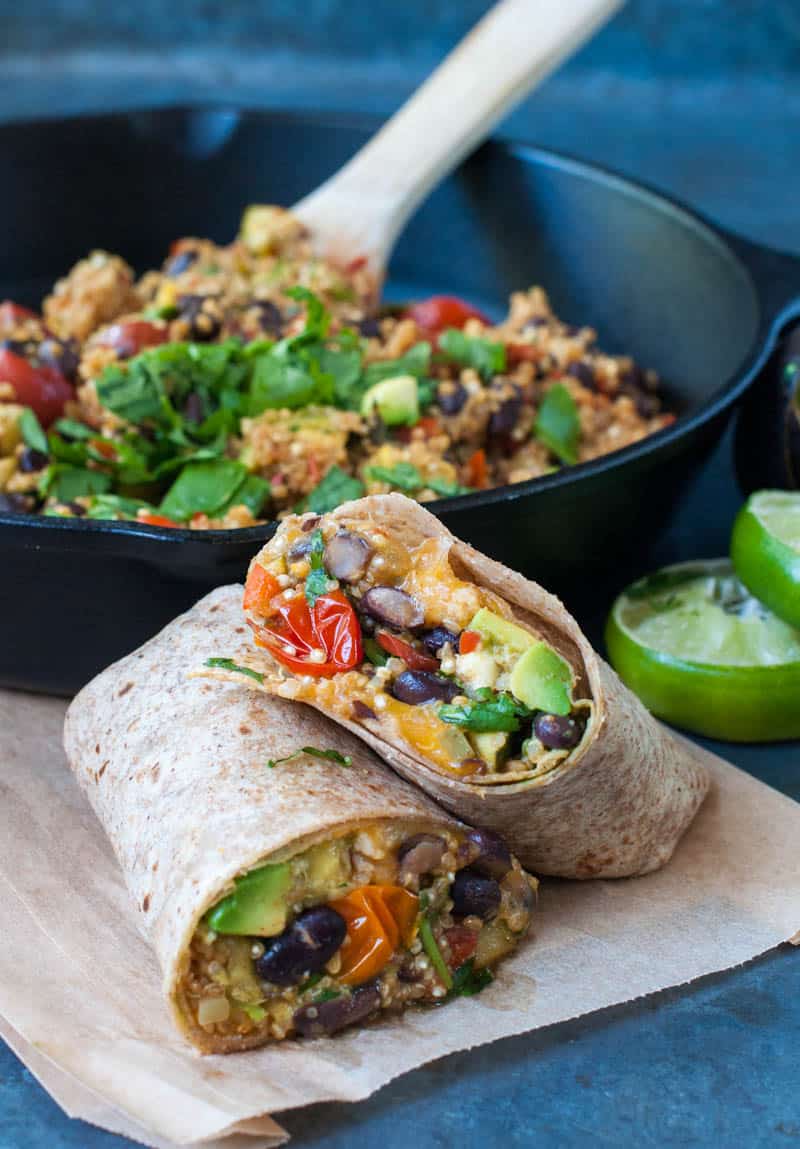
Below are some more of the photos I took while playing with different apertures and lighting.


If you live in the bay area you should definitely sign up for a course with Denise. Just go to her website and email her. She co-hosts small private classes (8-10 people) as well as instucts private and semi-private classes at her home studio. I highly recommend the semi-private or private class, as Em and I got all of our questions answered, and got some major one-on-one attention that you might not get in a class setting. Denise also has a mouthwatering cooking blog called, Chez us, that you should check out.
All I can say is learning photography is like learning any new hobby or sport, it takes lots and lots of practice, and that is what I am going to be doing over the next few months. I am vowing to only shoot in manual mode, so wish me luck!
In the next post I will go over lighting for nighttime or low light photography situations, and some props that are must needs for any food photographer.


15 thoughts on “Food Photography Workshop – Part 1”
Awesome! Good for you – I’ve always wanted to do something like this… and I really should start shooting in RAW too 🙂
This is so helpful! Thank you for sharing your new knowledge with us. I’ve been shooting in Auto as well but am ready to experiment. I’m also excited to hear how the course with Joy and Tracy goes. Have fun!
Hi Danielle. I’m happy to share all that I learned and I hope that it helps people get out of auto and into manual. I wanted to fit it all in one post, but I was way to tired to pull it all together. I have some great props (white and black boards) and this light diffuser thing to share in the next post as well as this light you can buy that makes your photos look like they are shot in the daylight even when it is pitch black out, great for those winter night shots. That is going to help me tons because I was stressing about shooting in the fall and winter.
Stay tuned!
Sounds like a fun class!
Darling girl – I am NOT sure about the top photo at all. I’m squinting up a MAJOR storm, not to mention in urgent need of a hair wash. Aside from that little hiccup – what a great post! Ive had to adapt mine to inform people that – whilst I was too lazy and unsure to pass on any info – you’ve taken the selfless route and done a great recap. I love it!! Love the way you’ve breezed over ISO as well …:) – I was looking at my notes on ISO – tried to write some and then just summed up by saying ‘stick at 400’ – good enough for us! :). I’ll be in touch this week RE: monterey market/ juice dates. Have an awesome time with the kids – I’d love to see Zoe again sometime and hear more about the humane society camp!! xox
What a great post and so glad you had this opportunity to take Denise’s class AND took it with your good friend, Em. Teamwork, baby! And it will help you both in the future when you can bounce things off each other, hey remember when she told us xyz…that will be great for both of you. How exciting…to finally feel like you’re grasping these concepts in reality is SUCH a good feeling!
I’m moving today…so I really should not be reading this much less taking time to comment…but I had to! I’m bookmarking this for later. This is great! I need to do this. Your photos are absolutely gorgeous!!!
xo
annie
I’m moving today…so I really should not be reading this much less taking time to comment…but I had to! I’m bookmarking this for later. This is great! I need to do this. Your photos are absolutely gorgeous!!!
xo
annie
oh i need to take a photog class soo bad! What a great post- i am bookmarking this!
You took some amazing pictures! I got my DSLR camera in January and I’ve started experimenting with Manual mode a couple of months ago, it’s amazing. I think I’ve started considering taking photography class after reading this post!
Your notes on aperture are great, really helpful!
Thanks for sharing!
Maria
Jackie!! This was SO helpful and exactly what I was needing. I’m a bit ashamed to admit that, like you and Em, I really have a bare minimum of understanding of my DSLR camera, and almost all my photos are taken on automatic settings. This is despite the fact that my Dad went to Bate’s photography school in Santa Barbara AND my twin sister is really into photography. I know I should get their help, and I do to some extent, but I’m way to lazy when it comes to learning my camera. This was so, so helpful and I’m going to try experimenting more. I always hear my Dad throw around terms like “aperture,” but I would just nod my head and move on. Can’t wait for your second post of this!
Hi Amy! I feel most of us are in the same boat. Cameras take such great photos automatically that most of us get lazy and just let the camera do all the work. I use to hear people talk about apertures and ISO’s and I pretended I understood what they meant, but I really didn’t. I’m still learning and will keep showing my progress. I took some photos today and I am still struggling with the focus factor. Some parts of my photo still blur no matter what I do. Oh well, practice makes perfect, right?
Hi Jacquelyn,
My husband thinks that I’m a silly girl too using just auto function with my camera… He reckon me having a DSLR is a waste of $$$.
Now, seeing your post. I felt like I’ve enhanced my photography knowledge a lot more. Thanks for all these tips!
Zoe
I stumbled on your blog and now I am just perusing around your site. I recently started a blog and have a ton to learn. I definitely need a lot of work with photography, haha! Thanks for sharing your experience with the class. Right now I am working with a regular point and shoot camera. One of these days I will take the splurge and get something nicer. For the time being, I am just learning as much as I can. Thanks so much!
Hi Christine! I do the same thing when I find a new blog that I enjoy. I love perusing around and checking out old and new posts. I actually should update that post with some new ideas. Don’t worry about the photography part. It will come with time. There are times when I get some great shots and other times where I just can get any right. It just depends on so many factors like the food that’s being photographed to the lighting etc. I mostly use the Priority setting on my camera and you know what, it usually takes a great shot. Manual is just too hard for me and takes too much time. When you get some free time, just play around with your camera. I know many food photographers that actually use an iPhone camera and their shots are AMAZING! I can’t wait to check out your blog 🙂 xoxo, Jackie